
Summer in Lofoten - 5 Best Hiking Trails

Norway offers an incredible variety of hikes bathed in the golden glow of the sun—well past midnight. Whether you’re chasing panoramic fjord views or strolling along Arctic ridges, these five unforgettable hikes will let you soak in the magic of the northern summer while the sun never sets.
Everyone has to experience the midnight sun at least once in their lifetime, and Norway is one of the most magical places to do it! 24 hour sun begins May 26th, and lasts until July 17th. One of the best parts about visiting Lofoten in summer is being able to watch the sunset and sunrise all in one hike without heading to sleep in between. Starting on July 17th, you can witness the sun begin to set, and almost immediately start rise right before your eyes. Some of our favourite hikes in Lofoten have involved starting our ascent close to midnight and finding ourselves back down at our van in the early hours of the morning before heading off to sleep. We’re very excited to share our 5 favourite hikes in Lofoten, Norway with you!
If you’re new to backpacking, or looking to upgrade your gear and don’t know where to start, check out our full Backpacking Gear Guide to make sure you’re well prepared. Here you will find information on the ten essentials, safety must-haves, and complete hiking checklists for your trip.
This post contains affiliate links, which means I may earn a small commission if you make a purchase through them—at no extra cost to you! This helps support the blog and allows me to keep sharing travel tips and outdoor adventures. Thank you for your support!

Our Responsibility
Through our platform, we hope to provide tools and help you create a connection with these wild places that fuels a shared responsibility to protect and cherish them. Together, we have the responsibility of taking care of the outdoors and leaving it better than we found it. Always respect and follow Leave No Trace principles. By committing to LNT, we contribute to the preservation of these landscapes, ensuring they remain pristine for future generations to come.
HOW TO GET TO LOFOTEN

There are 3 major airports you can fly into:
Bodo (4 hour ferry from Reine - book your ticket from Bodo to Moskenes HERE)
Narvik (5 hour drive from Reine)
Leknes (1 hour drive from Reine, but more expensive for flights & car rentals)
Bodo or Narvik tends to have the cheapest flights and car rentals, while Leknes is the closest central airport. Coming from North America, we have quite a long journey to get there, so we like to stay in Bodo for one night before picking up our rental car and taking the ferry over.
WHERE TO STAY
Where you stay depends on how you want to travel! There are some beautiful hotels, bnb’s and local homes for rent throughout Lofoten. There are also some amazing options to rent a campervan, which gives you more freedom to explore the islands without the restraint of sleeping in one place.
Here are some of our favourites!

Exploring with a campervan is one of the best ways to see Lofoten

One of the most beautiful spots to stay in Reine

Beautiful views between Henningsvaer and Svolvaer with many room options.

Find more of the best stays in Lofoten at the link below:
OUR TOP 5 FAVOURITE HIKING TRAILS


REINEBRINGEN
Trail Difficulty: Challenging
Statistics: 5.8-km (3.6-mile) return, 521 m elevation
Average time: 3 hours
Best time to visit: May-October
I will warn you, this is a very popular area for hiking in Lofoten, so expect traffic on the trails depending what time you go! But it is popular for a reason, and not one you will want to miss. Reinebringen will take you on a challenging, steep stair climb to the top where you will end up at the most breathtaking view point overlooking Reine, Sakrisøy, Hamnøy, and into the Reinefjord and Kjerkfjord. The stone steps we’re built by Sherpas from Nepal!
Download the trail map here.
Tips for this trail:
Always check the trail conditions before you go with recent reports. It’s best to do this hike on a dry day so that you avoid slippery steps and get to enjoy the view with clear visibility! Rain will bring mud and slippy conditions.
For parking, we parked at Reine Kulturhuset which is the outer harbor that had plenty parking and we paid 40 NOK/hr. This allowed us to extend extra parking time as we needed while up on the mountain!
Check the weather. The weather in Lofoten can change very suddenly, so double check it looks good before you go, and bring extra dry layers for the top.
This route is not recommended for young children and dogs for safety reasons.
During the day, expect crowds! I recommend catching these views for sunset, although there most likely will be others up there enjoying the view with you regardless of the time.
ALWAYS tell someone where you are going and when you will be back. Have a GPS/SOS for emergencies.

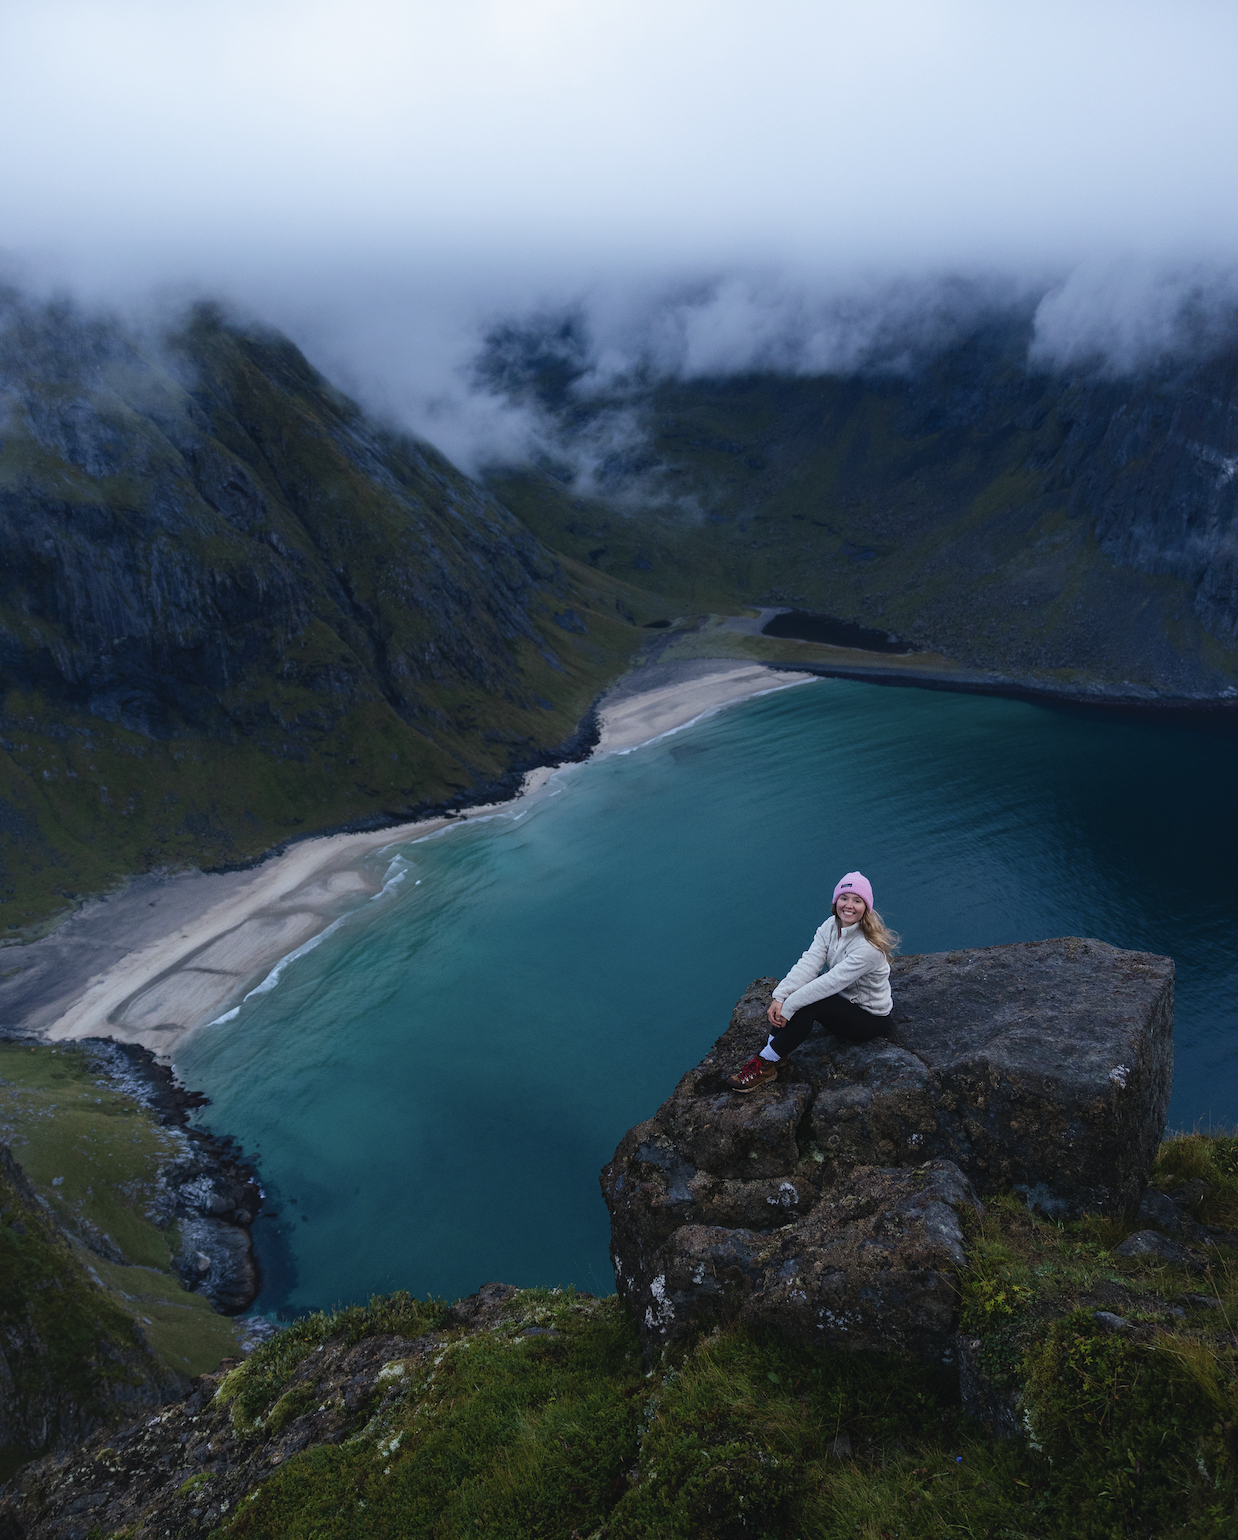
KVALVIKA - RYTEN
Trail Difficulty: Hard
Statistics: 8.9-km (5.5-mile) return, 920 m elevation (Kvalvika & Ryten together)
Average time: 6 hours
Best time to visit: June-October
This hike to the iconic Ryten will take you up 920m overlooking the most picturesque white sand beach and piercing turquoise water. Located near Fredvang on Moskenesøya, Kvalvika and Ryten is in Lofotodden National Park. There are a few different ways to complete these two hikes. If you would like to do Ryten only, park at Innersand.
If you would like to hike Kvalvika Beach and Ryten, or just Kvalvika beach, park past Fredvang.
If doing both Kvalvika and Ryten, the trail takes you up 200m before descending. Once you get to the top of the pass the trail will start to take you down towards the beach. Here the trail gets steep and quite slippery if wet. Eventually as you descend down towards the beach, you’ll arrive at the grassy dunes at the back of the beach. The beach is a gorgeous spot to camp or a great snack spot before you start your ascent up to the top of Ryten. On the right side of the beach you will see a little stream flowing down from one of the hills. Beside it, you’ll see a path, take this up towards the top of Ryten. This is a very popular hike so you are almost guaranteed to see others out enjoying the scenic views of the sea, Vestvågøy and the breathtaking mountains of Lofoten.
Download the trail map for RYTEN ONLY here.
Download the trail map for KVALVIKA AND/OR RYTEN here.
Tips for this trail:
It is not necessary but hiking poles can be quite useful for the uneven and rocky terrain of this route. I also recommend good hiking boots that have adequate grip and that you don’t mind getting wet and muddy!
Dogs are allowed on this route, although many recommend leaving them behind due to the rocky and scrambling parts of this hike.
I recommend arriving early morning or late evening (for a sunset hike) to ensure you get a parking space.
Ensure you bring enough water, snacks, and extra warm layers for the likely wind that will meet ya on the top!
ALWAYS tell someone where you are going and when you will be back. Have a GPS/SOS for emergencies.
BEST HIKING BOOTS


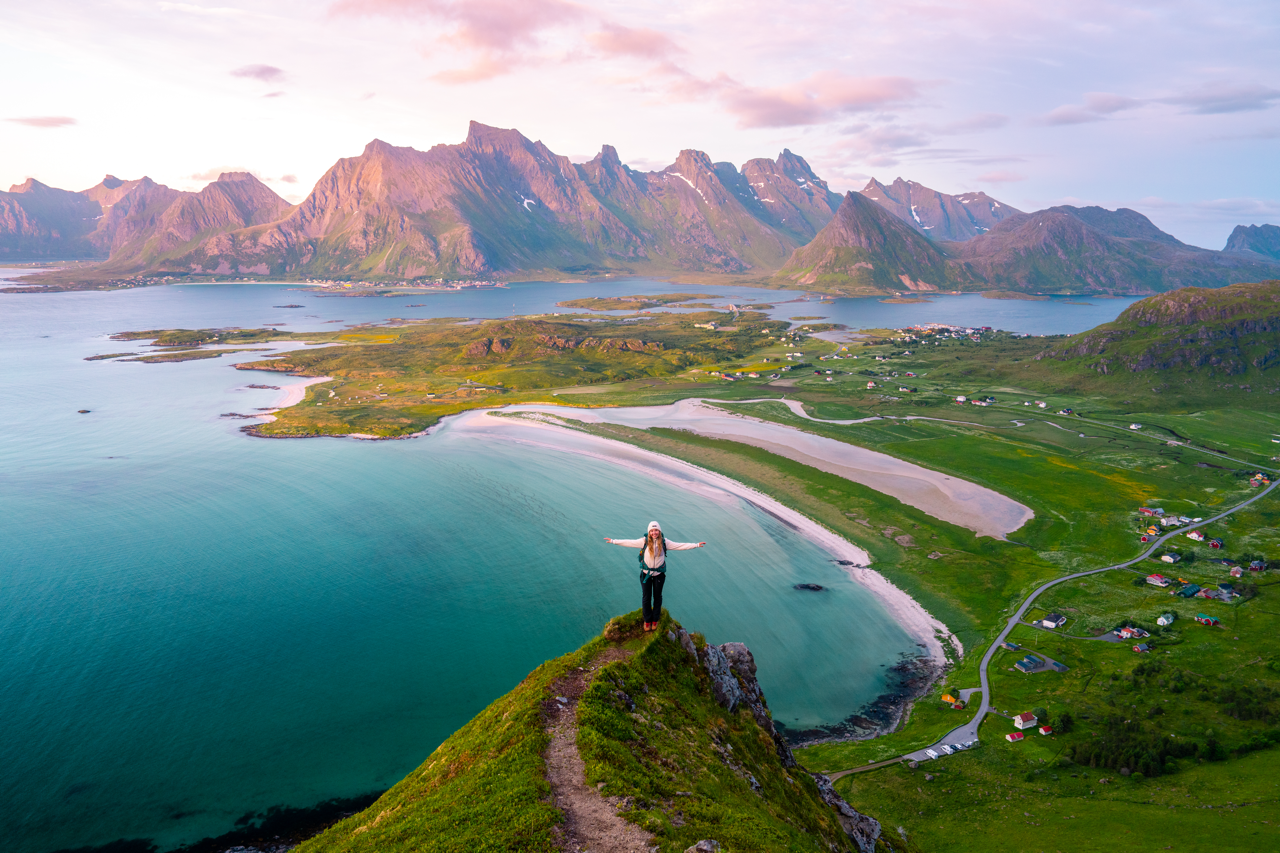
ROREN
Trail Difficulty: Moderate
Statistics: 5.5km (3.4 mile) return, 355 m elevation
Average time: 2.5 hours
Best time to visit: May-October
I would classify this as a “minimum effort, maximum reward” kind of hike. It’s not that it isn’t difficult or effort as you ascend up 355 m, but in a relatively short amount of time you are rewarded with the most striking views of the mountains north of Flakstadøya, the sandy beach of Ytresand, and the vast sea below. Once you manage the first part of the ascent with some narrow switchbacks, your walk along the cliffs is easy going and filled with endless breathtaking views!
Download the trail map here.
Tips for this trail:
Check trail conditions and weather forecast before you go, the weather in the mountains can be unpredictable. It was very windy up at the top so be sure to dress accordingly and pack essential gear such as water, snacks, and extra layers.
Don’t let the shorter distance fool you, you will still need adequate hiking shoes to navigate the steep, possibly muddy terrain and narrow switchbacks!
The parking was free although it is a small car park at the bottom of the hike that only holds about 5 cars. There are reports of fines being given to people that squeeze extra cars in the lot! I recommend arriving at the hike early or for the sunset if you are ready for a late one!

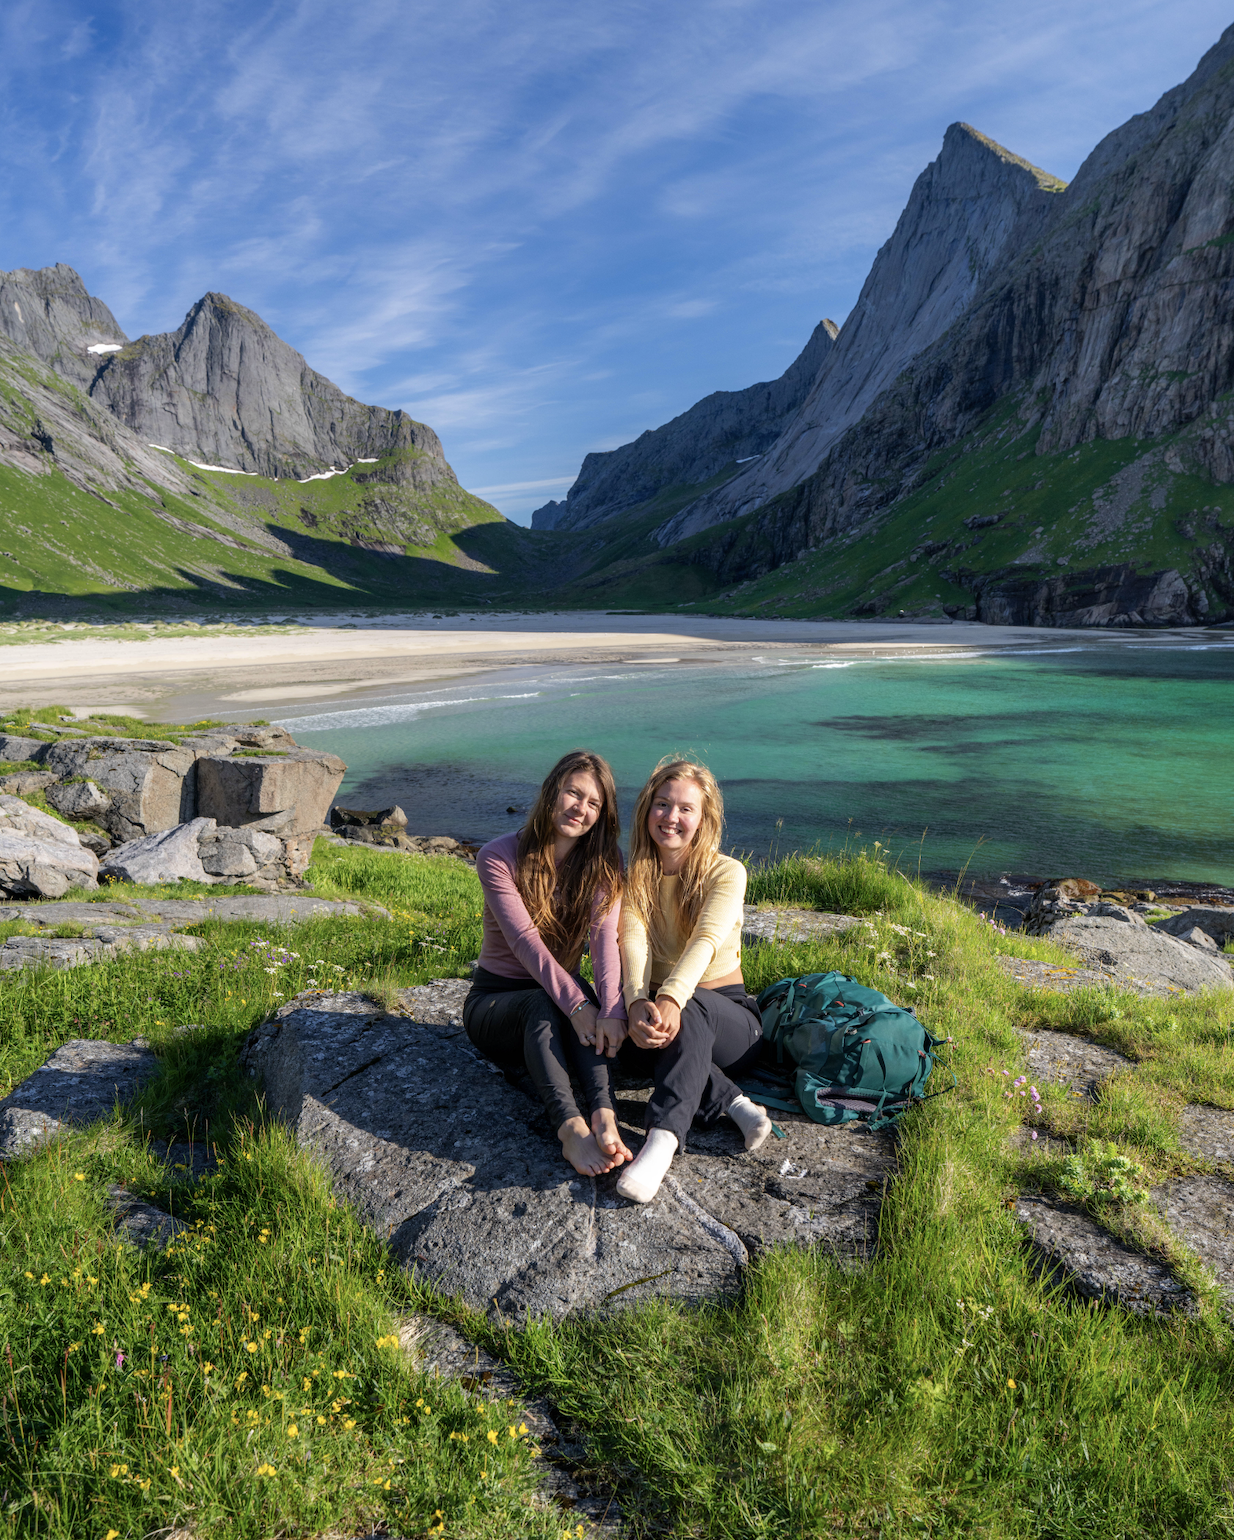
HORSEID
Trail Difficulty: Moderate
Statistics: 9.8-km (6.1-mile) return, 505m elevation
Average time: 3.5 hours
Best time to visit: April-September
In my opinion… a “MUST DO” in Lofoten! This was a highlight of the trip for us. This is considered a easy to moderate hike although I would add that it ended up feeling more challenging than expected with an flooded trail at points and our backpacks full of our camping gear! I highly recommend spending a night here to really soak up the beauty of this serene, and oh so peaceful paradise! The trail lands you at arguably one of the most beautiful beaches in Lofoten, Horseidstranda beach.
Download the trail map here.
How to get there:
This hike requires you to take a ferry from Reine to small port called Kjerksfjorden at the north end of the Reinefjord. From there, you follow the the trail up and then down through the mountains before reaching the beach.
The ferry between Reine and Kirkefjord hurtigbåtkai runs 2-4 times a day during the summer and takes 25 min. We booked ours ahead of time. Before hiking to Horseid Beach, check the ferry schedule to avoid getting stranded on your way back!!
Tips for this trail:
Check trail conditions, weather forecasts, book your ferry and check ferry return times before you go. The weather in the mountains can be unpredictable. Although it was sunny when we visited it was VERY windy, so be sure to dress accordingly and pack essential gear such as water, snacks, and extra layers.
This trail was flooded and very muddy at points! People we met on the trail had completely soaked feet. I recommend bringing extra lightweight footwear like sandals with thick socks if you are planning on staying overnight so that you aren’t hanging around with wet footwear and cold feet.
We paid for overnight parking in Reine and parked right where the ferry collects you.
There was only one other couple camping when we were there midweek, although this trail is marked as a popular route for bird watchers and hikers!
Leave no trace: LNT means also picking up the garbage you see. As with any outdoor adventure, it's crucial to practice Leave No Trace principles to minimize your impact on the environment and preserve the natural beauty of the trail and this beautiful beach for future generations.

FESTVAGTIND
Trail Difficulty: Very Challenging
Statistics: 2.4-km (1.5-mile) return, 500m elevation
Average time: 3.5 hours
Best time to visit: May-September
This trail takes you on shorter but steep scramble up large boulders and rocks where you reach unreal views of Henningsvær and the Vestfjorden. This is a very popular area for hiking, in midsummer we found it difficult to find parking for our camper van in the late evening before our hike! This trail requires some extra balance on loose rock and the ability to follow and navigate the trail without markings. The start of the hike is next to the main E10 road and there will be a sign for the trail. Immediately you will arrive at large boulders to climb over before reaching the trail again. Once you pass the pond on your right and continue your ascent up the trail, eventually you will reach a split where you will have to keep to the left. The other route takes you to the lower viewpoint. The trail keeps winding its way up the mountain side until you finally reach the ridge and can look across to the sea.
To get to Engagement Rock can be quite tricky to find and dangerous. Do not do this alone. From the top of Festvagtind, head back to the right (or north), and walk until the trail descends a bit before finding a small trail that leads up a rocky area to the left. Then you will descend slightly before continuing on to the left until you see the large ‘Engagement Rock”. There is a pretty clear trail, so if you find yourself not on a clear path, return immediately to the main trail.
Download the trail map here.
Tips for this hike
Make sure you are well prepared check the weather beforehand! As always, good hiking boots, extra layers, extra food and water is recommended!
This hike requires navigating without markings, and using both your feet and hands to scramble over the rocks at points. There are some pretty challenging sections and quite steep sections of rock to navigate yourself over.
Dogs are NOT allowed.
It is a very unclear trail, I recommend to go with a map and route downloaded!


Thanks for reading!
Hopefully these tips have helped inspire you to plan your next trip! Happy travels!


